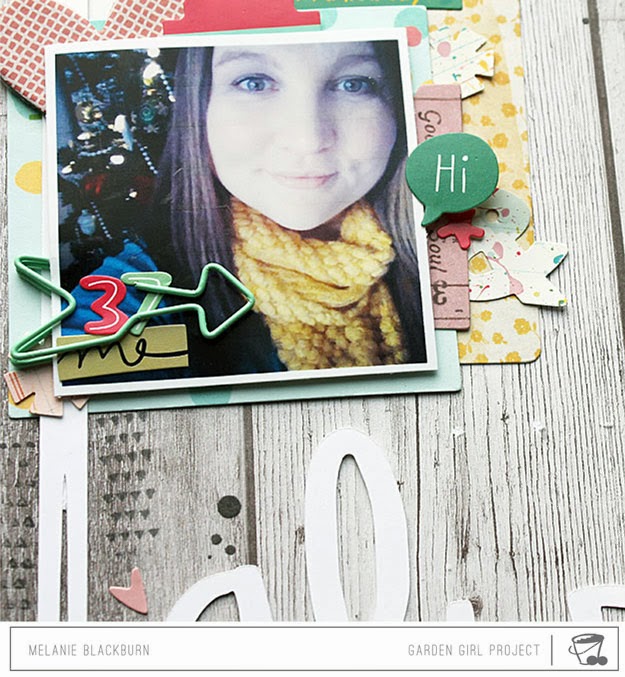
This layout focuses on the rub-ons from this collection. You can see more details by stopping by the Chic Tags blog.
Showing posts with label Cameo. Show all posts
Monday, May 26, 2014
Click with Chic Tags
Happy Monday friends! Today I'm sharing a layout I created for Chic Tags using the latest collection Cloud 9. This collection really speaks to me, the lovely vibrant colours and fun sayings are a joy to work with. The full collection can be seen on the Chic Tags site.
Sunday, March 23, 2014
Wild Ride with Chic Tags
Happy Sunday friends! I'm doing a rare weekend post to share a layout that is up on the Chic Tags blog today, some of the DT members are featuring projects that were created with the fabulous Chic Tags Exclusive March Kit. In case you didn't know that Chic Tags had monthly kits, I would highly recommend you check them out. The kits are fun and versatile and very affordable. Every month I just love what Chic Tags create, they amaze and inspire me.
Thursday, March 20, 2014
Moments Video with Two Peas
Hello friends! Today is a big day for me, my very first video is up at Two Peas in a Bucket. You see, I've never created a video before but it was the next logical step to take in my scrapbooking career. Of course the concept scared me but with the help of some amazing GGs, friends and hubby, I created my first video. I know it is not perfect, I know what I need to do differently next time and I know I want to do more!!!! You see, I'm a terribly shy person, talking in front of people at work, doing presentations, scares me so much but doing a video was different. I'm still able to share with people what I love to do but without the stage fright! I'm very happy with this.
Monday, February 10, 2014
Always Be Me with 2Peas in a Bucket
Hello friends! This past Saturday I was sharing a project on 2Peas, this month's theme is ME. Too often we scrapbook about the people we love, we might overlook one important person, YOU. The GGs are bringing you a lot of projects that will hopefully inspire you to create layouts about YOU because you should be in your albums. Your kids, family, loved ones need to know about you as well.
Hope you will stop by to see my full project!
Friday, January 10, 2014
Story with Chic Tags and Epiphany Crafts
I'm back today to share my second layout for the Chic Tags and Epiphany Crafts collaboration. All the details are in the blog post below.
On this layout I decided to use the epoxy banners that I created with the Epiphany Tool as arrows, I paired them with the rub on arrows from the Happy Place collection. I also used the punch portion of the tool to make the banner at the top of the teal paper. This is one fun little tool to play with.
The title was created with my Cameo using a font called SP Purkage, I downloaded this font years ago when cutting out titles with an exacto knife was all the rage. The journaling was done with my electric typewriter, this is another reason why I love this smaller format, I can put the journaling directly on my cardstock. Thank you to Epiphany Crafts for providing this fun little tool.
Thursday, January 02, 2014
Today with Hip Kit
Today I'm sharing a layout that I created for Hip Kit club using the November kit. Even though the November kit was Christmas theme, some of the papers and embellishments work very well for a non-themed layout.
I prefer using a white background but I do love this shade of Kraft paper by American Crafts. It coordinated very well with my picture and my choice of pattern paper. I did add some stitching around the edges, it just adds a fun whimsical touch to the layout.
Wednesday, December 18, 2013
So Very Loved with Jillibean Soup
That she is!! My sweet baby girl is so loved by her big sisters, sometimes even a bit too much. They love to make her laugh, make sure she has all the toys she needs, she is very lucky to have such awesome big sisters!! So grateful that my girls have each other.
This layout is created for Jillibean Soup and features the Christmas Cheer Chowder and the chevron placemat. I had some leftovers of my favourite placemat and decided to cut it up and use as a focal point for my title. The title was cut with my Cameo, I used a font called SP Purkage that I got many years ago.
Monday, December 16, 2013
Fa La La with Chic Tags
With Christmas just around the corner I am more than ever inspired to create Christmas themed layouts. Today I'm sharing a layout I created for Chic Tags which features the Good Tidings collection.This layout is for our Sunday Sketch challenge. Ashley has created another stunning layout, it was a blast to play along. All the details are on the Chic Tags blog.
The sketch features a banner along the bottom of the pictures, I decided to use the photo toppers from the Good Tidings collection to create the banner. I find that adding more details such as snowflakes, sequins and stars, always make things more interesting.
I used white Mister Huey to add splatters to the woodgrain but in doing so I made a mess and it didn't look right. So I used the wonderful gold star rub-ons from the Good Tidings collection to hide my mess, in the end it worked out.
Tuesday, December 10, 2013
#Broken with Hip Kit Club
Happy Tuesday friends, I'm back today with a layout for Hip Kit club which features the awesome November kit. Kimberly put together an awesome kit with some of the best holiday themed products released this year.
I decided to scrapbook an unfortunate tradition, every year someone breaks an ornament and for the past couple of years its been Brianna, poor girl is always traumatized by it. The cut file is from Studio Calico and I used my typewriter to add a second title in the cut file.
Friday, November 22, 2013
#loveyou with Hip Kit Club
TGIF!!!! I want to share a layout created for Hip Kit club using the September kit. After a recent discussion on a message board, I decided to try out 8.5x11 and this was my first layout in this new (to me) format. I have to be honest, I love the process of creating with a smaller format and another advantage to using this format, I am able to use my typewriter to journal directly on my cardstock.
Love this colour combo of gold, navy and green. Funny how a couple of years ago I would have never used gold on a project but now I can't get enough!! Loved working with the September kit, the colour palette varies from soft pastels to warm hues like navy. It is such a fun and versatile kit.
Tuesday, November 12, 2013
Everyday with Hip Kit Club
This layout was created for Hip Kit club using the fabulous October kit. Of course now that I've went to NYC with my oldest I will have lots of pics of our trip to scrap. I thought this was the perfect one to use first, it was taken in Central Park, it just makes me happy!
I can never get enough of the CP chipboard frames, I love using them as mini canvas to create clusters of embellishments. Lots and lots of layers going on here.
I really admire scrappers that can beautifully mix various alphas to create a lo, I just can't seem to make it work, so I do the next best thing, I use a focus word in my title and cut it using my Cameo. The "everyday" word was cut with white cardstock and I used the Tim Holtz gold stain to colour it, love how it turned out.
Last but not least I created a simple card using the leftovers from this layout. Don't you just love the mix of teal pp and kraft cradstock?!
Friday, November 08, 2013
Family with Hip Kit
Happy Friday friends, it's been a busy week on my blog and I'm back today to share another layout created with the fabulous October Hip Kit. This layout is a busy one! The large gold splatter was created with the Tim Holtz stain, to create this effect simply remove the sponge tip applicator and splatter the stain with the underside of the applicator. It gets messy but that's the fun of it!
I wanted to create a fun accent to my layout so I cut various leaves shapes using my Cameo and backed them with pattern paper. I also added some stitching around each leaf, just a little extra something to make it more fun.
You can see the splatter effect I created with the Tim Holtz stain, I just love this stuff. Seriously awesome to work with, so happy that Kimberly added it to the kit.
Thursday, November 07, 2013
Hello Today with Jillibean Soup
Today I want to share a layout I created for Jillibean Soup using the Chilled Cucumber Soup. I love working with triangles but I don't like cutting them freehand, so I was happy to come across this template in the Silhouette store. I decided to use scraps of paper to put on the backside of the triangles, the white triangles were stitched on the white cardstock, love the contrast this creates.
I matted my pictures on layers of pattern paper and velum. I also used the tags and coordinating label stickers. When I struggle to fill in a section on my layouts I will often create this little tabs using a mini punch and scrap paper. This creates a fun accent that adds another layer to the layout.
I've mentioned before that I keep cut files on hand this way I always have random cuts to use on my layouts. For this particular layout the cut files were my source of inspiration to create the title work.
Wednesday, October 30, 2013
Cute Pumpkin with HipKit Club
Today I'm sharing 2 projects I created with the fabulous October Hip Kit. Love the mix of orange, navy blue and gold accents, such fun colours to work with at this time of year.
My first project is a layout, I love all the little bits of embellishments, diecuts and stickers included in this kit. I knew I have to create a big cluster of embellishments on my layout and I think it worked out pretty well!
I just love the shirt my youngest daughter is wearing, I wanted to create an accent pumping, to do so I used my Cameo and simple pumpkin shape, which I layered with pattern paper and stitched around the edges.
This kit is full of awesome embellishments, I love embellishments and layering them onto my layouts. I wanted to create a focus area with journaling and embellishments. To achieve this look I "dumped" the accents on my layout and just started to play around with them, almost like a puzzle. It was a very fun process.
I also have a card to share, love pairing the kraft with navy blue, such a beautiful combination. This card is rather easy to create, I used stickers layered with die cuts embellishments. Added stitching a typed greeting with my electronic typewriter.
Wednesday, October 23, 2013
Ready Set Go with Chic Tags
Hello friends! I'm so excited to share this layout today. I just loved working with the School House collection, it's a fabulous line. I blogged about this layout and close ups, on the Chic Tags blog, I hope you will check it out.
Monday, October 21, 2013
Hooray For Fall with Chic Tags
Happy Monday folks!! Hope your weekend was lovely, mine was a blast! Spent the weekend in NYC with Danika, we had such a good time. Danika was amazed at all the sights and sounds that NY has to offer.
Today I'm sharing a layout I created for Chic Tags for the Sunday Sketch Challenge. You can see the full sketch and reveal here ---> Chic Tags Blog. I hope you will play along because you could win a $10 gift card from the Chic Tags store!!! Woot!! Woot!!!
To create my layout I used the October Chic Tags Exclusive Kit ----->October Kit. Not only is the kit perfect for PL, it's also fantastic for layouts.
I often keep random Cameo cuts on hand to use as I need them, this saves a lot of time. The leaf stem was cut on white cardstock, which I misted with Gold Mister Huey and added splatters. I think it resulted in a very fallish accent for my layout.
One of my favorite item from the October exclusive kit is the stamp set, especially the #reallife stamp, it is so fun and versatile, I have a feeling it will appear on a lot of projects.
I know I've shared it before but in case you would like to see it again, here is the Chic Tags exclusive October kit. I know theres a limited amount of these kits, so if you are on the fence I wouldn't wait too long.
Tuesday, September 24, 2013
Together Time with Chic Tags
Today is a good day. I'm sharing my first tutorial on the Chic Tags blog. I decided to embelish the journaling card using DMC floss. It's a quick way to add a fun detail to an already fabulous card. All the details on my process is on the Chic Tag blog, I hope you'll stop by.
Another fun technique that I used on this layout is layering masks, first I used the Prima polka dot 12x12 mask with gold Mister Huey mist. Once that was dried I used a portion of the Jillibean Soup placemat with dewey Mister Huey mist. I really like the subtle, yet fun effect this creates.
I paired the Chic Tags with Crate Paper's On Trend collection. I recently found a small paper pad at Winners and boy was I happy to come across this treasure. I've been on the hunt for this collection for a long time, I was happy to finally have it.
Friday, September 20, 2013
Happy Together with HipKits
Happy Friday friends, I'm back today with another layout created with the August Hip2BSquare hip kit. I struggled at first with this layout, but once I pulled out the chevron cut, it all came together pretty quickly. Funny how one small item can change the design for the better. I layered the chevron velum paper on top of the teal cardstock, love the subtle effect it created.
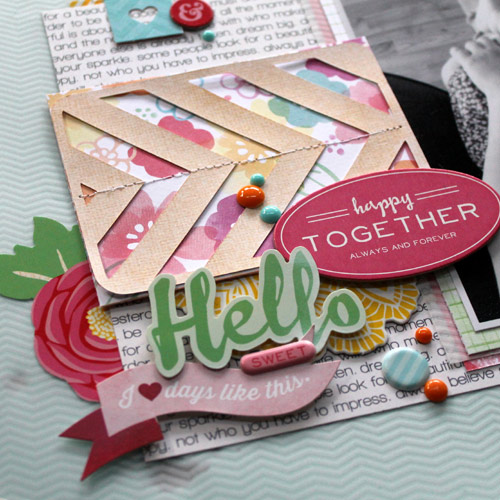
I always cut multiple files with my Cameo, this way I always have shapes on hand and ready to use. Once the file was misted and layered with pattern paper, I layered stickers and chipboard shapes to create a focal point on my layout.
Hope you have a lovely weekend and have time to go out and enjoy the great outdoors, I just love this time of the year.
Monday, August 26, 2013
Monday Cards
Thought I'd start this week by sharing a couple more cards I created with the July Hip Kit. I combined some Cameo cuts I had in my supplies with the embellishments in the kit. Both cards are similar in design but the background and embellishments make these cards stand apart. I always make sure to have extra Cameo cuts on hand, its really handy when creating projects.
Friday, August 23, 2013
You & Me
Happy Friday friends, today I would like to share a couple of projects I created for Jillibean Soup. Both projects feature the awesome Chilled Cucumber Soup collection, which features one of my fave color combo, yellow, grey and teal. Love!! The honeycomb placemat is fabulous, I loved adding pattern papers to create a fun background. Of course I added some stitching, stamping and misting. The title cut was purchased from the Silhouette store and cut using American Crafts glitter paper, my fave!
My vision was to have butterflies "flying" out from underneath the picture, the diecuts were the perfect item to achieve this look. The process was rather simple, once my picture was down, I just started to tuck in and layer the die cuts until I was happy with the result.
I added some stamps and sequins to the embellishments, the Chilled Cucumber stamp are totally adorable and so versatile!
I had a bit of the honeycomb placemat leftover so I decided to use it to create a card. I paired it with the stamps from the same collection, makes for a quick and lovely card.
Subscribe to:
Posts (Atom)